Github 블로그 with Hugo #2
![]()
Hugo 블로그 추가 설정하기
1. Introduction
기본적인 Hugo 블로그 설정 후, 더욱 멋진 블로그로 만들기 위해 추가 설정을 해봅시다. 이 과정을 통해 블로그의 기능을 확장하고 개성을 더할 수 있습니다.
2. Configuration
Hugo의 핵심 설정 파일인 hugo.toml을 수정하여 블로그를 커스터마이징합니다.
아래는 주요 설정 항목들입니다.
1. HTML 태그 허용, 이모지 사용, 경고 무시
# hugo.toml
ignoreLogs = ['warning-goldmark-raw-html']
enableEmoji = true

[markup]
  [markup.goldmark]
    [markup.goldmark.renderer]
        unsafe = true  # raw HTML 렌더링
이 설정으로 게시글 작성 시 HTML 태그 사용이 가능해지고, 이모지를 활용할 수 있습니다.
또한, 일부 경고 메시지를 무시하여 빌드 과정을 더 깔끔하게 만듭니다.
2. Pagination 설정
# hugo.toml
[pagination]
    pagerSize = 5
pagination을 통해 게시글을 효과적으로 관리할 수 있습니다. pagerSize는 한 페이지에 표시될 게시글의 수를 지정합니다.
e.g.

3. Taxonomies 및 메뉴 설정
# hugo.toml
[taxonomies]
    category = "categories"
    tag = "tags"
    series = "series"
[menu]
    [[menu.main]]
        identifier = "about"
        name = "About"
        url = "/about/"
        weight = 1
    [[menu.main]]
        identifier = "categories"
        name = "categories"
        url = "/categories/"
        weight = 2
    [[menu.main]]
        identifier = "series"
        name = "series"
        url = "/series/"
        weight = 3
    [[menu.main]]
        identifier = "archives"
        name = "archives"
        url = "/archives/"
        weight = 4
taxonomies를 통해 게시글을 체계적으로 분류하고, 상단 메뉴 바를 설정하여 사용자 경험을 향상시킬 수 있습니다.
4. 테마별 추가 설정
선택한 테마에 따라 다양한 추가 설정이 가능합니다. 예를 들어, Paper 테마를 사용한다면 다음과 같은 설정을 추가할 수 있습니다:
# hugo.toml
[params]
    color = 'linen' # 'linen', 'wheat', 'gray'

    # header social icons
    twitter = ''
    github = 'dnjdsxor21'
    instagram = ''
    linkedin = ''
    rss = true

    # homepage profile
    avatar = 'dnjdsxor21@gmail.com'
    name = 'Nunu'
    bio = 'Biomedical AI Developer'

    # icon
    # 이미지 파일은 'static/img/favicons/', 'static/img/posts/' 에 저장
    favicon = 'img/favicons/favicon.ico'
    appleTouchIcon = 'img/favicons/apple-touch-icon.png'
이러한 설정을 통해 블로그의 색상, 소셜 미디어 링크, 프로필 정보 등을 맞춤 설정할 수 있습니다.
결과
3. Front-matter 활용하기
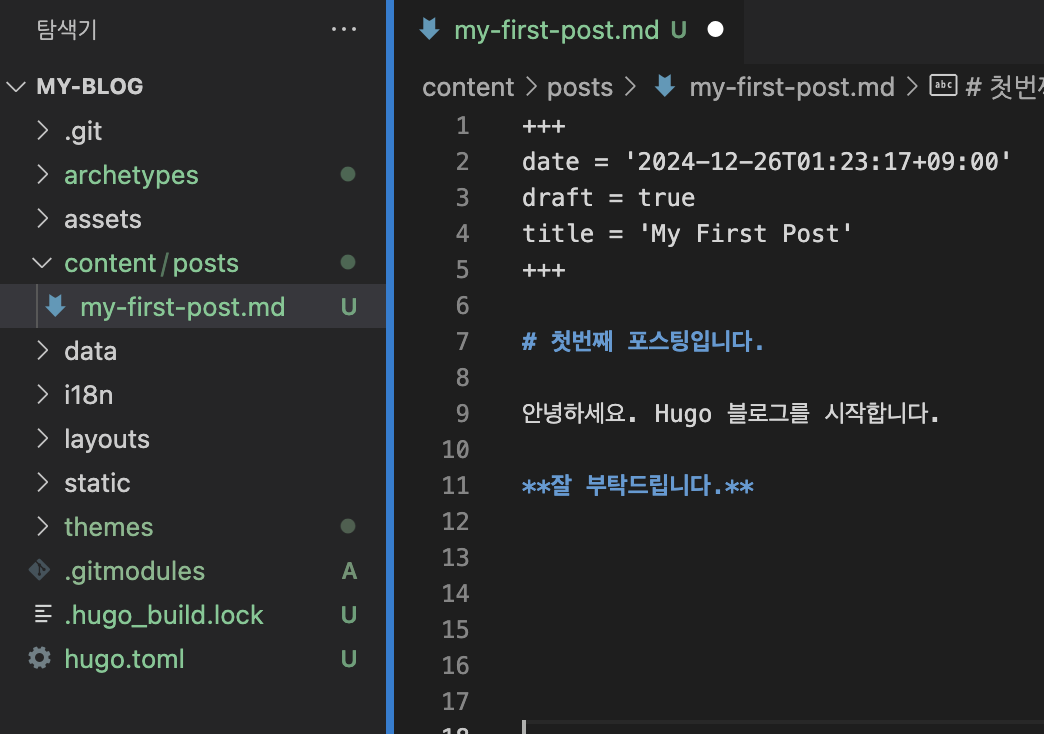
게시글의 메타데이터를 정의하는 front-matter는 블로그 포스트 관리에 매우 중요합니다. 다음은 front-matter의 예시입니다:
+++
date = '2024-12-01'
draft = false
title = 'python에서 openai 공부'
categories = ['python']
tags = ['python','openai']
series = ['python']
weight = 10
+++
이를 통해 게시글의 날짜, 제목, 카테고리, 태그, 시리즈 등을 지정할 수 있습니다.weight 를 지정하여 게시글을 상단에 고정할 수 있습니다.
4. 마무리
설정을 완료한 후, 다음 명령어로 변경사항을 적용하고 배포합니다:
hugo
git add .
git commit -m 'feat: edit hugo.toml'
git push
이러한 추가 설정을 통해 Hugo 블로그를 더욱 풍성하고 개성 있게 만들 수 있습니다.
더 자세한 내용은 공식 문서, 테마별 문서에서 확인하세요.